Although Google has stopped showing Authorship related data (including author photo) in search results but still it is a good idea to add authorship and publisher information in your posts. Here I am going to explain the difference between rel=author and rel=publisher markups.
Google provides several rich snippets that can markup information about pages in your website. One of the most commonly used snippets is the one that claims authorship (rel=author). The primary reason why one should use this snippet is to establish claim that the material on the given page has been written by the person.
A lot of bloggers use authorship markup but not many people care about rel=publisher. The publisher markup is also very important and as useful as authorship –however, it works differently.
If you’ve read our above mentioned article, you already know what rel=author markup does. Now here is what rel=publisher can do for you.
If a certain page in your website contains written material not authored by you (for example, a guest post) –then it is technically wrong for you to display your photo as the author of that piece in SERPs. But because the article has been published on your blog/website you most certainly are the publisher of that article. And this is where rel=publisher is a good markup to use.
The process is exactly same as we mentioned in our rel=author related article. HOWEVER, you must connect the publisher markup with a Google+ Business Page and not to a personal Google+ profile/page. You can have both rel=author and rel=publisher markups but the publisher markup has to point towards a business page.
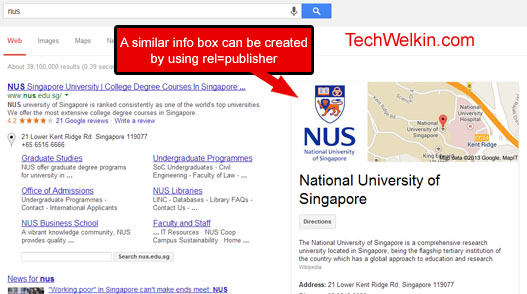
Unlike the small photo of author resulted by authorship markup, the publisher markup creates an elaborate box on the right hand side of the first SERP. The box contains all the information about publisher that can be collected from Google+ Business Page. Info box similar to the one shown below get generated.

rel=publisher markup creates a similar box in serp


Leave a Reply