Android phones have always been a step ahead when it comes to gesture control features. However, over a period of time iPhone and iPad too have introduced some really cool gesture control features. With iPhone’s Switch Control feature, you can create custom switches to perform functions on the phone that would normally be done with your hands using the iPhone’s camera. This feature detects your head movement and lets you assign a task to it. For example, you can multi-task by tilting your head instead of double tapping the home button. This feature is designed to make the iOS device range more accessible to those who might not be able to interact with the iPhone, iPad or iPod touch in a more traditional manner.
This article will guide you through the process of activating the Switch Control and creating your own custom switches on your iPhone.
Enable Switch Control
To set the feature:
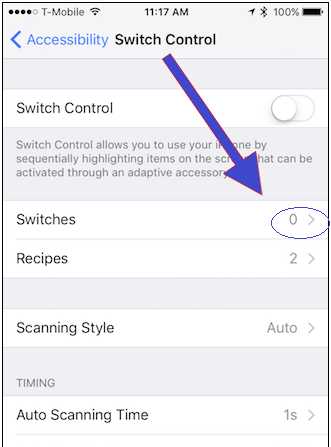
Go to Settings -> General -> Accessibility > Switch Control.

Before you toggle the option to ON, you must define the switches.
Add a New Switch to Switch Control in iPhone
You can use any of the sources as a switch:
- External: Choose a Bluetooth switch.
- Screen: Tap the screen to use a switch.
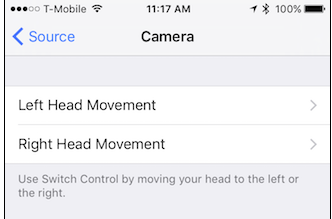
- Camera: Move your head to use the FaceTime camera as a switch. You can use the camera as two switches: when you move your head to the left, and the other when you move your head to the right.
Setting up Camera Switch
- Tap the Switches > Add New Switch> Camera. When you turn on the Switch Control, the camera will continuously scan your face until it detects your head movement. To define a gesture, you need to assign actions to the left and the right head movements.

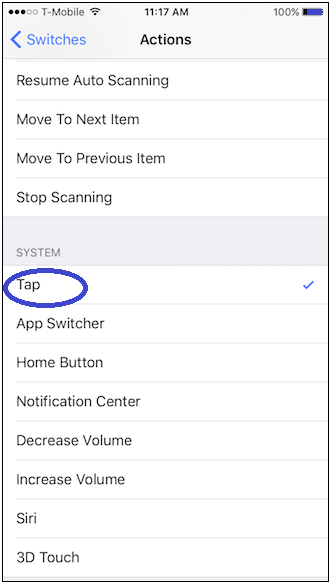
- Choose an action from the options. For the first head tilt to right, choose Tap and for second head tilt to left, choose Select. Now whenever the system asks you to select something that you want, you can tilt your head to the left to select it and tilt to right to open it. You could also select Siri, to activate the Voice Assistant without touching it. You can assign a number of actions to the head gesture from the options available. Follow the on-screen steps to define more switches and choose how you want the switch to work.

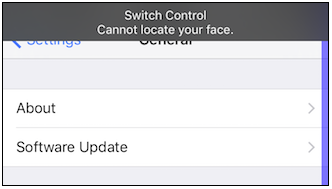
- After defining the head gestures, toggle the Control Switch to ON. As soon as the option is enabled, the device screen will display a blue border or an outline. You can play around with the Switch Control option and adjust the sensitivity of your head tilts, check how quickly the system scrolls through the onscreen items, and so on. If your head tilts are wrong, Switch Control will display a warning message.

Using traditional gestures is a lot easier and more accurate than using head gestures, but nevertheless, the feature is still something that you may still want to try out. It is a good accessibility feature for those users who find it difficult to use their hands to control an iPhone. The setup process is somewhat complicated but with some practice you will be able to control iPhone or iPad efficiently using head movements. The switches may not always work the way you want it. Just follow the steps mentioned above again to define the switches till you get it right. As mentioned earlier, it needs a bit of practice to make the gestures perfect.
Should you have any question on this topic, please feel free to ask in the comments section. Our reader community and we at TechWelkin will try to assist you. Thank you for using TechWelkin!


Leave a Reply