Nowadays, some YouTubers actually record many tutorials right on their mobile phones. In my opinion, iPhone is best suited mobile phone for making a YouTube video. But then the question comes up — which is the best app for screen recording on iPhone? Well, as iPhone comes packed with loads of features — it is no surprise that it actually has an inbuilt screen recording facility! Today we will see how you can screen record your iPhone!
How to Enable Screen Recording on iPhone / iPad
- In your iPhone / iPad go to Settings > Control Center > Customize Controls
- Tap the green colored + icon next to Screen Recording option
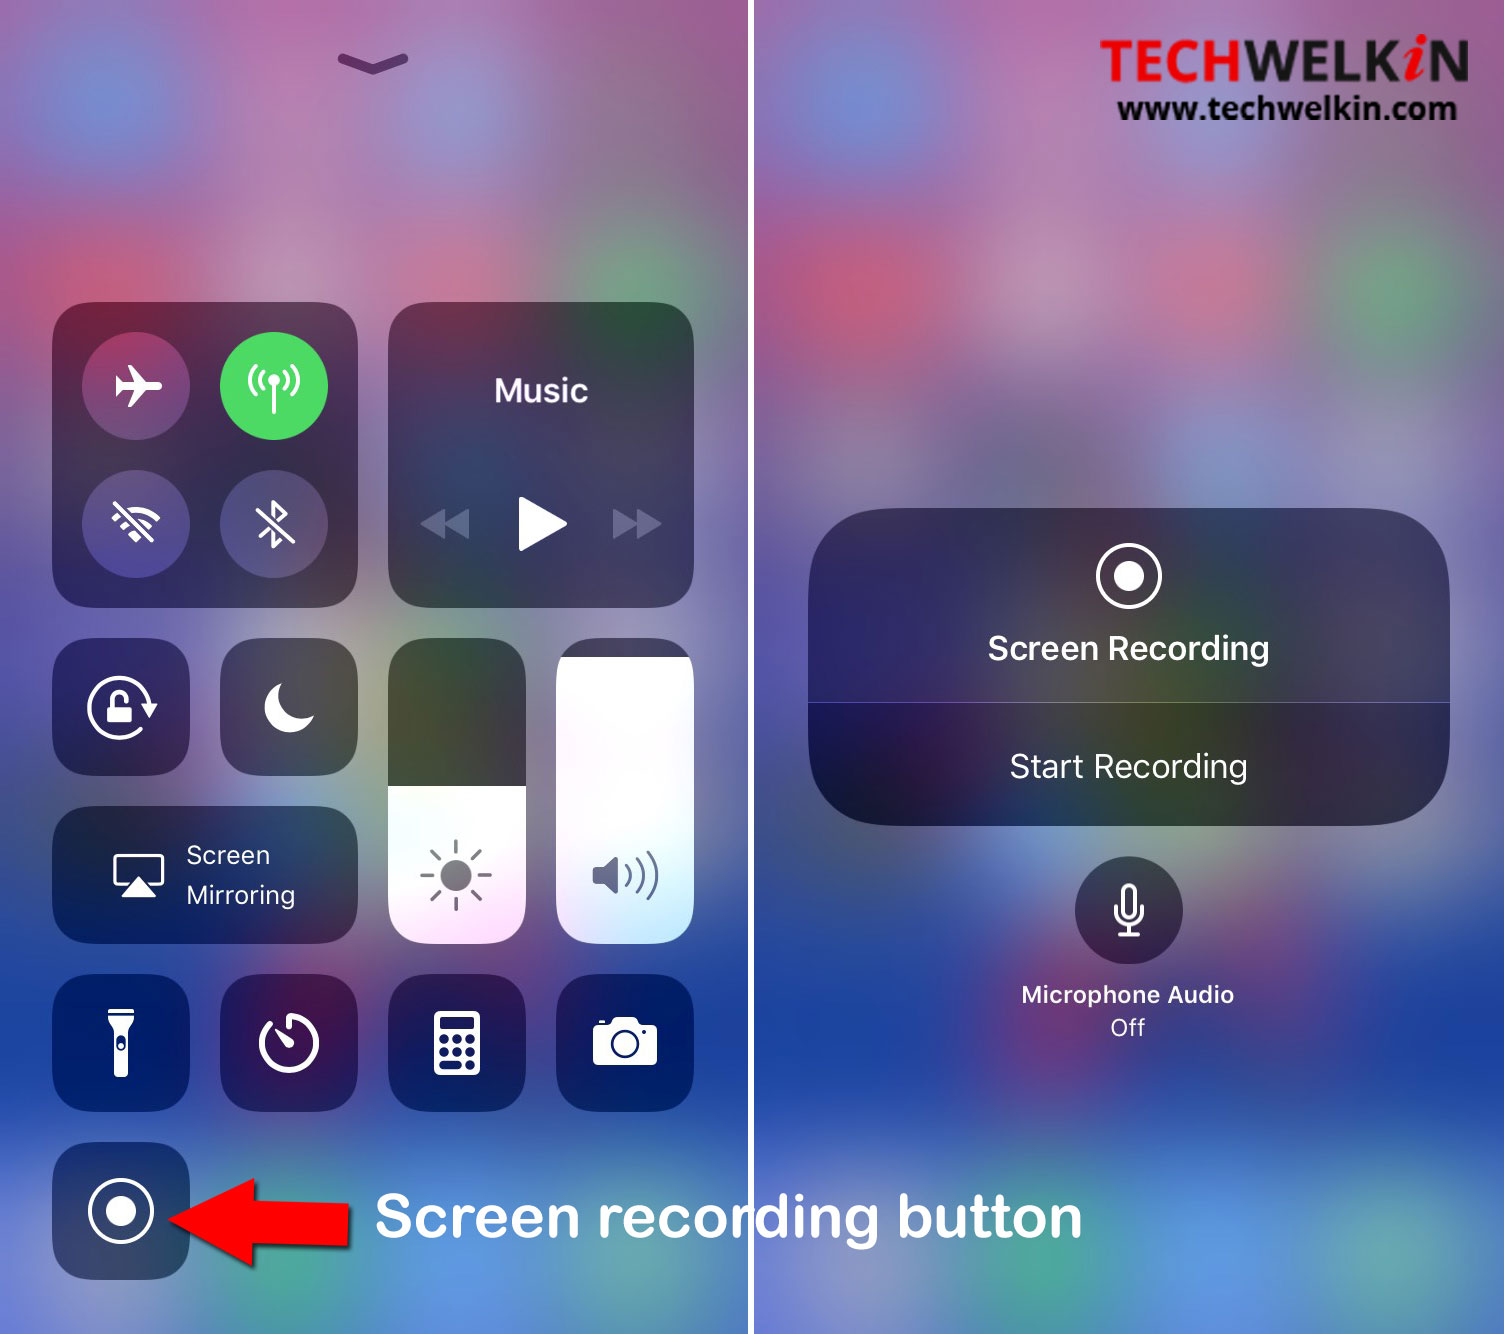
- Get out of the Settings and swipe the bottom edge of your phone’s screen up. This will open up the Control Center
- You will now see a new control added in the Control Center. This is for screen recording.

How to Record Screen of an iPhone / iPad
- If you want to screen record along with microphone, long press the screen recording icon. This will give you option to turn on the microphone recording
- If you only want to capture screen, just tap on the screen recording icon and a three-second countdown will begin. After this the recording will start.
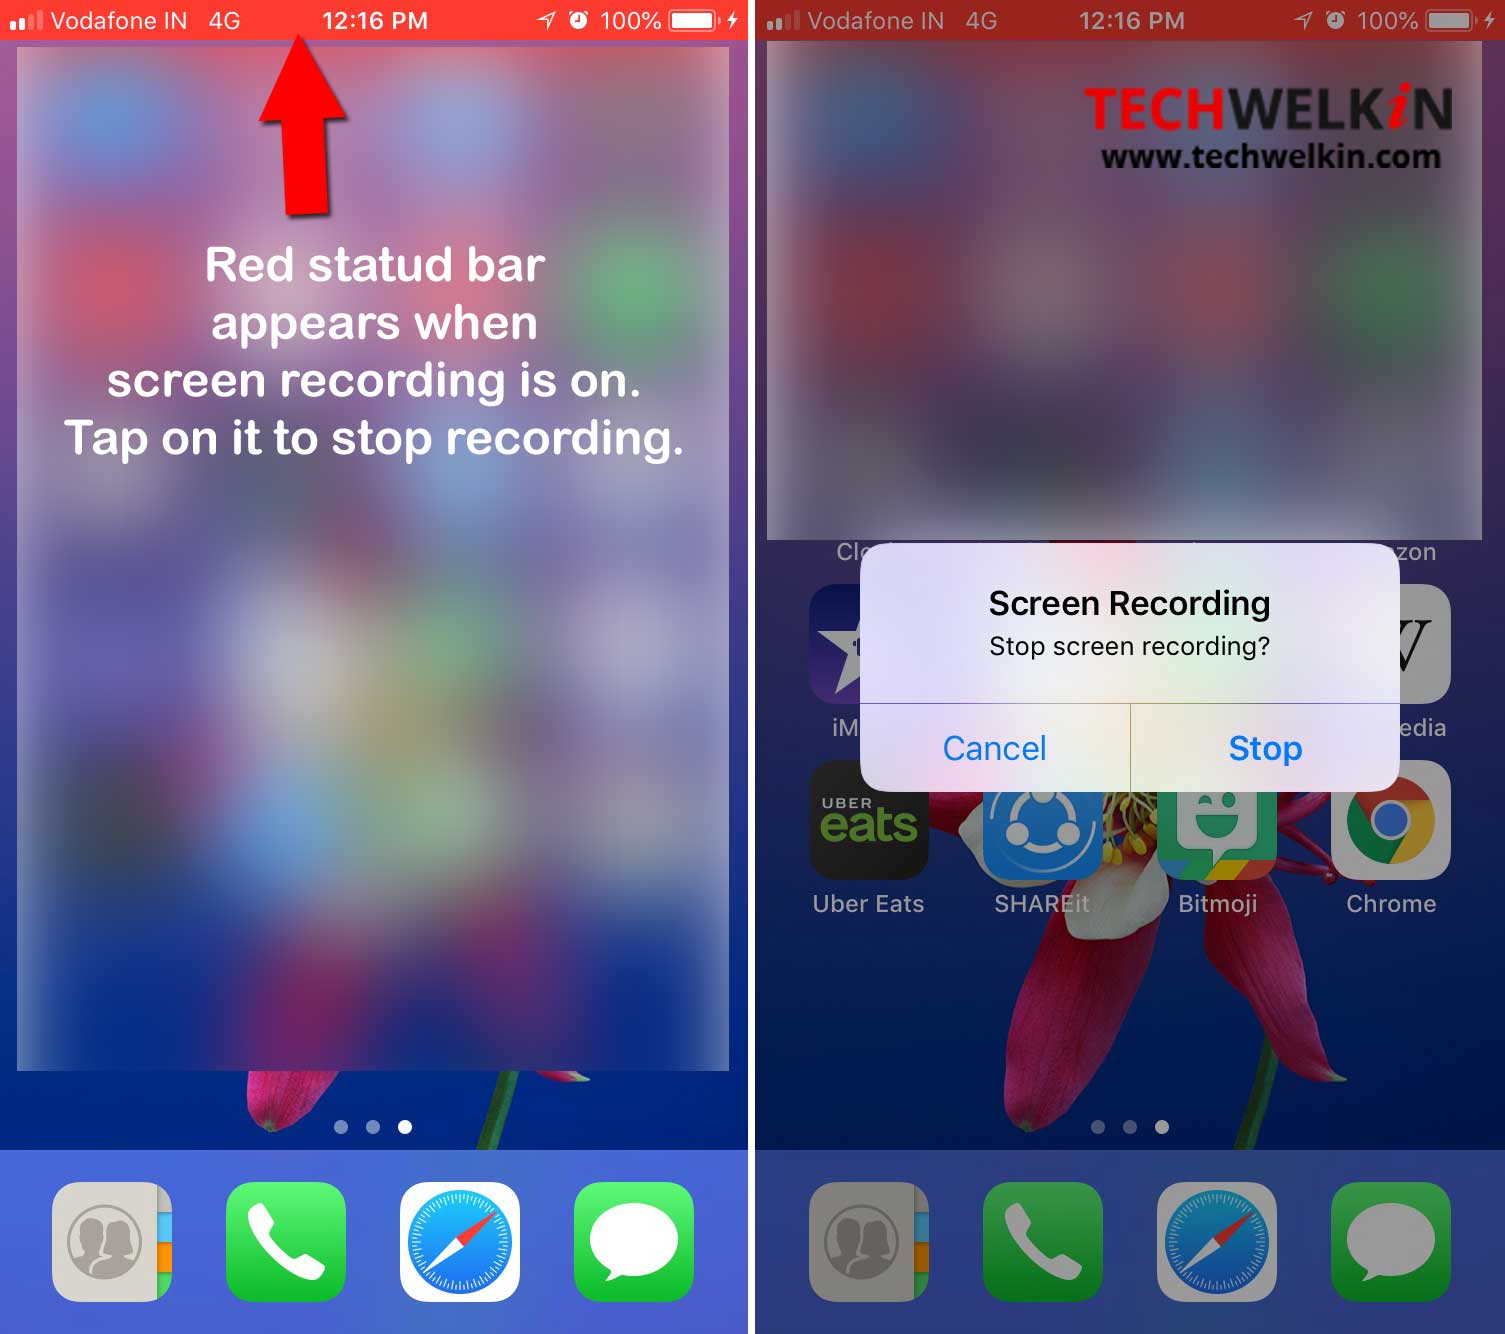
- When you’re done, just tap on the red color status bar on top of the screen to stop the recording.
- Recorded video will be saved in your Photos app.

Once the recording is done, you can edit the video with iMovie app. A lot of third-party apps are also available from the App Store.
We hope this tutorial was useful for you. Please share your comments / suggestions and questions with us!

Sir,
I really liked your QR code genaretor, PNR checker and this video+audio maker for iphone.
Great job sirjee. I have instantly became your fan.
Thanks for great posts.
this is good article sir