With the advent of smartphones, we all have become photographers! We never get tired of uploading photos from our smartphones. With most smartphones, the process of uploading photos is automatic if the required app is pre-installed. However, there are many who love to take photos with their Digital Cameras. Now is it possible to upload photos directly from the Digital Camera and synchronize it with the storage? Yes, it is possible!
Use Your Computer to Upload Photos Automatically
If you are using one of the earlier models of digital camera, probably it does not have a built-in Wi-Fi or cellular data connection. In the absence of both, you cannot upload photos from your camera without the required hardware. However, if you have the required tools installed on your PC, you can connect your digital camera to your computer and it immediately start uploading photos. Alternatively, you can remove the SD card from camera and insert it into your computer to start uploading the photos automatically.
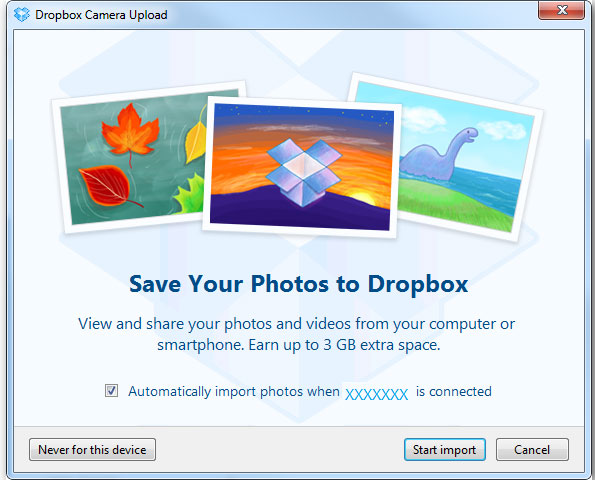
Using Dropbox Camera Upload
If you are a frequent Dropbox user, you can easily upload your photos from your Camera. Dropbox has neatly integrated the upload function in Dropbox app.
To upload photos to Dropbox:
- Ensure that you have the latest version of the Dropbox desktop with the Camera Uploads option enabled.
- As soon as you connect your SD card or the camera to your computer, the app will prompt you to upload the photos to your Dropbox folder.
- Choose Import Pictures using Dropbox.
To enable the Camera Uploads feature:
- Click the Dropbox icon in your system tray and click the Settings
- Choose Preferences > Import and select the checkbox option Enable camera uploads for.
You can either choose to enable camera uploads for photos and videos, or only photos.
The photos from your camera will automatically save to the Camera Uploads folder in your Dropbox account.
Using Google Backup and Sync
For Google Photos, install the Google Backup and Sync app for Windows or Mac. The tool offers a simple user interface. Besides backing up files on your desktop computer, it can be used to backup photos from USB-connected devices, cameras, as well as SD cards. The app has all the features of the Google Drive and Google Photos apps, and it links to both services in the menu.
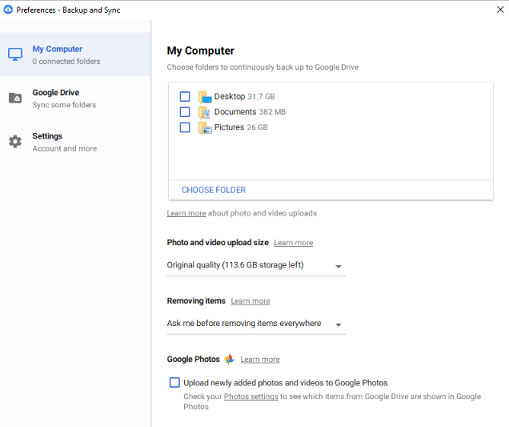
After the backup is complete, your files can be accessed in Google Drive from any device — including your computer or it will be available in Google Photos.
Upload Using OneDrive
If you have OneDrive on your computer, it can automatically upload images from your Camera or SD card. OneDrive starts uploading images automatically from any device that is currently connected to your computer.
Apple’s Photos app for Mac will allow you to import your photos into your iCloud Photo Library.
Various other services also offer similar automatic upload features. You can upload to any cloud storage service or remote folder by configuring the camera import software.
Use WI-Fi Enabled SD Cards
Besides the above-mentioned options, you can opt for a Wi-Fi SD card. Such cards are compatible with most digital cameras. With this card, you can add the upload and sync feature to your standard digital camera. There is a variety of Wi-Fi cards available in the market. The cheapest will provide a web interface only while the best cards will provide mobile and desktop applications to simplify the upload process. With some cards, you can immediately and automatically start sharing to social media sites or integrate with multiple cloud storage and also upload to your Dropbox account. The most popular Wi-Fi SD card is the Eye-Fi card. Even if you have not used it, you must have definitely heard about it.
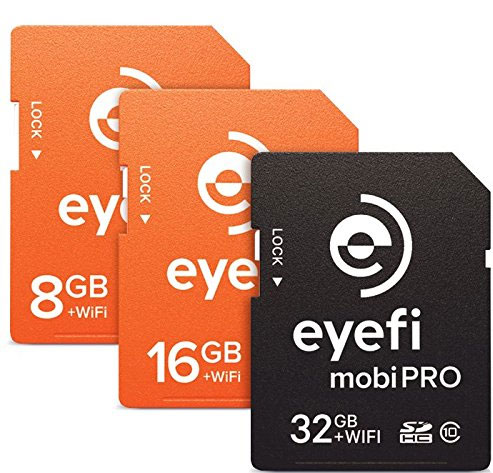
After procuring an Eye-Fi card, you can set it up by plugging it into your computer’s USB reader, install the software and configure the networks to connect with the card.
If you are an impatient person, who immediately wants to share pictures and video with the world, this card can do it for you with no fuss. The Eye-Fi memory card allows you take an endless amount of pictures as long as you are connected to a WiFi connection.
The Eye-Fi card includes additional camera features for different models. Check for the features that support your camera.
Wi-Fi Digital Cameras
Of late digital cameras that bundles the ability to connect to Wi-Fi network are in demand. It holds true for both types- the high-end digital as well as the point and shoot cameras.
If you are planning to buy a Wi-Fi enabled camera, do remember that the setup takes time and you should be aware of your Wi-Fi network name and all the related technical details. However, after you successfully set it up, you can usually upload your photos to the storage site that is owned by your camera’s manufacturer (Cloud).
Whether you are an amateur but passionate photographer or a professional photographer, you must opt for a solution that best meets your requirement. You have to decide whether it is the Wi-Fi SD card or the Wi-Fi Camera that will meet your requirement. Or, will your requirements be met by just connecting your camera to your computer; the choice is yours, just pick the right solution.
Do share the solution that you opted for. We would be keen to know your experience.
Should you have any question on this topic, please feel free to ask in the comments section. We, at TechWelkin and our reader community will try to assist you. Thank you for using TechWelkin!
Leave a Reply