If you’re reading this article, chances are that you have a very beautiful website design made probably in Adobe Photoshop and saved in PSD, JPG, PDF, AI, or PNG format. Now you want to convert this image file into a WordPress theme so that you can apply it on your newly created website or blog. You might also be wishing for a PSD to WordPress converter —but what if you could do this conversion all by yourself and that too free of cost!
Many people who are good at graphic designing come to this point of converting a PSD to WordPress theme. And they feel stuck! But it’s not their fault. Creating a website requires not only the ability of producing a great looking design but also it needs some programming skills. You must be an expert in at least HTML, CSS, JavaScript, jQuery and PHP programming to turn your PSD file into a webpage. The trouble is that most people are either a good designer or a good programmer!
However, you worry not. It is not all that difficult to convert a PSD into a WordPress theme. All you need to know are the right steps to take. In this article, I am going to tell you the same! Let’s begin to learn.
Those who do not know, PSD stands for Photoshop Document. It is a file format in which Adobe Photoshop saves workable files. You can open PSD files in Photoshop and make more changes in design as you wish. PSD files are therefore, sometimes, called the open files (referring to the fact that these files can be edited).
Comprehensive tutorial on how to convert a PSD file into a WordPress theme.
When you want to make design of your dream website, it is likely that you will choose Photoshop for materializing it. Photoshop is undoubtedly the best and the most popular graphic design tool.
WordPress is a essentially a free blogging platform. This open-source program has enabled even the non-programmers to easily create their websites or blogs. WordPress is robust and scalable and it is written in PHP language.
The design of a WordPress based website is called a theme (and sometimes, a template).
Step 1: Slice the PSD File
Once your PSD file is ready, first of all, you need to break it into pieces. Why? Well, because the single image will be big in size and will take more time in loading. Also, you will have to associate different behaviors with different segments of the image. So, you need to slice it up.
But it’s not that you can just cut the image randomly. You should make pieces in a logical fashion. For example, header may become one piece, footer should be separate… then you can cut up background, buttons and menus etc.
Adobe Photoshop allows you to use layers. It has built-in facility to slice the PSD and save the resulting segments as separate image files. You may choose to save these images in JPG or PNG formats. If you require transparency to work in any of these segments, then you must save it as PNG because JPG does not support transparency.
While cutting the image, you should be precise. Mistake of even one single pixel may make two pieces unfit for rejoinder.
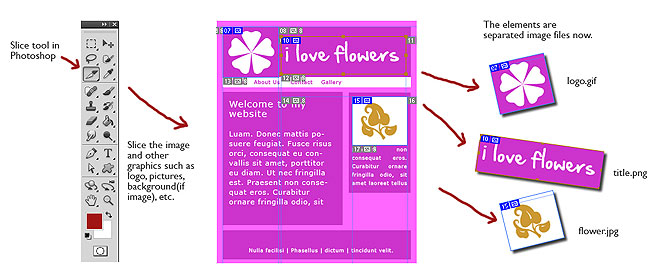
This is how to slice a large PSD file into smaller images. Image courtesy: MonsterTut
While slicing a PSD with the aim of converting it into a WordPress theme, you should understand that now CSS is pretty powerful and it can create a number of elements just with a few lines of code. For example, you can create solid color backgrounds, gradient backgrounds, buttons of various styles, lines, arrows and special symbols just with CSS. So, you don’t need to save these things as images. Lesser the number of images, faster your website will load.
Following YouTube video shows you exactly how to slice-up your PSD file and save it in various images:
Alright, now that you have various pictorial elements of your website design, it is time to move on to the next stage.
Step 2: Create HTML and CSS Files
Now begins the basic coding part of the process of converting PSD into a website. You basically need to create a webpage and assemble all the sliced images in a way so that it looks exactly like your PSD.
First you create an HTML file. You can name it anything, but as per convention let’s name it index.htm. In this file, you would need to write HTML or XHTML code to show various image pieces from your PSD. For creating the foundation layout, you can use DIV elements. DIV elements are very versatile. You can put DIV elements side-by-side, overlapping, on top of each other. You can align DIV element center left and right and also you can position them very specifically at particular coordinates on the webpage.
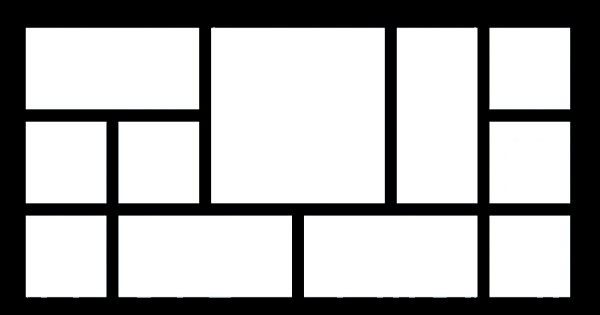
Grid layout can be easily made with CSS as well.
In these DIV elements you can call the saved images and show them as such or as background of the DIV.
After finishing this basic layout of your webpage, you need to stylize it to make it exactly like your PSD. For styling, you should use Cascading Style Sheet (CSS) rules. With these rules you can use various font styles, sizes, colors, text shadows, grayscaling of images, borders etc.
For writing CSS style rules, you should create another file called styles.css and then call this CSS file into your index.htm file. Styles present in the styles.css will be applied to various elements in your HTML files.
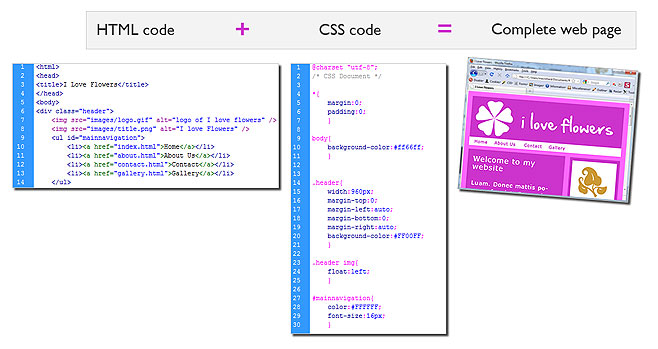
Using HTML and CSS, we can again combine the image parts t produce a webpage. Image courtesy: MonsterTut
OK, wait! If you do not know anything about HTML or CSS coding, don’t worry! These are very simple scripting languages and you can easily learn them online. Following are some of the online resources where you can learn CSS and HTML:
Tutorials For HTML
Tutorials For CSS
Step 3: Break HTML File into WordPress Theme Files
At this point in the process of converting PSD to WordPress theme, you would have one HTML file (index.htm) and one CSS file (styles.css). In the third step, you would need to break the HTML file as per the theme structure of WordPress. Feeling confused? Well, WordPress has a pre-defined set of files that are called together to produce a webpage. For example, while showing a post, WordPress calls for the content of header file, post file, sidebar file and footer file among other. But you have all the code in just one file —index.htm. So, you would need to distribute the code of index.htm into various WP files. It is mainly a cut-paste job! Here is the list of some of the important theme files for WordPress:
- archive.php
- category.php
- comments.php
- footer.php
- header.php
- index.php
- page.php
- search.php
- sidebar.php
- single.php
- style.css
- 404.php
To create a basic WordPress theme, you would want to create at least header.php, footer.php, sidebar.php, single.php and index.php.
Just create these PHP files in any text notepad editor and copy the relevant code from index.htm into these files. The code that create header part will go into header.php, footer code will go into footer.php … so on and so forth.
If you’re not well-versed with PHP, you might face difficulty in properly creating these files. There are some really good and free online tutorials for learning PHP. W3Schools and PHP.net provides easy to understand PHP help. You can go through these tutorials to get grasp of PHP.
The following YouTube video will help you in understanding how to setup a “naked WordPress theme” (it basically means —a blank WodPress theme.
httpv://www.youtube.com/watch?v=7xRidojtDSY
Step 4: Add WordPress Functions and Tags
Now it’s time to convert your simple PHP files into WordPress theme files. For this you would need to add WordPress tags in your files. But you might ask, what exactly are WordPress tags?
As I told you, WordPress is an excellent and robust platform. It provides you a great number of built-in functions that you can easily call and get things done.
Let’s take an example to understand it better. On your homepage (index.php) you might want to show a list of latest posts. This list should automatically change as and when you make a new post. You can write your own PHP functions to fetch the post data from database and show it on the homepage. But the makers of WordPress have made your life easier! You would not need to write your own detailed functions. Just use the wp_get_recent_posts($args, $output) function of WordPress and see the list of recent posts being displayed!
WordPress has comprehensive online documentation that gives you information on all the functions and other facilities available in WordPress. Documentation also contains plenty of examples and therefore it is very easy to understand. Follow the links given below to access this documentation:
Once these theme files are ready, you should put them in a folder which should be named same as the name of your brand new theme. This folder can also have other folders to keep CSS files, JavaScript files and image files.
You can also include an image file named screenshot.jpg or screenshot.png. This file will be shown as the thumbnail image of your theme. It’s easy to learn how to take screenshot.
List of files in a typical WordPress theme may look like as show below:
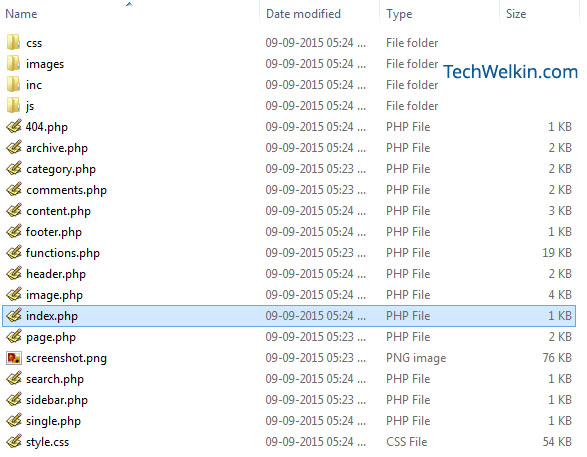
List of files in a typical WordPress theme.
You need to upload your theme folder in the /wp-content/themes folder of the WordPress installation. For example, if you call your theme Minerva —then the theme files should be in /wp-content/themes/minerva
After uploading your theme folder, go to the Dashboard of WordPress and then go to Appearance > Themes. Here, you will be delighted to see your self-designed new theme listed among the themes available for activation. Just select your theme and activate it.
Take a look at the following video to see the further process:
httpv://www.youtube.com/watch?v=LyJXE51g8QM
Step 5: Add More Functionality like Search and Custom Functions
Your WordPress theme is already done, up and running. The journey from PSD to WordPress theme has finished. But you might still want to add more functionality to your theme.
For example, you could create a search.php file with the code that shows the search results from your website.
You could also create custom PHP functions and use them in various other PHP files. You should create a functions.php file to keep the custom functions in one place.
In order to handle 404 (Page not Found) errors, you can create a 404.php file. WordPress will show the content of this file whenever someone would try to access a URL of your website that does not exist.
You might also want to add some JavaScript functionality. JavaScript is the most widely used client-side scripting language. You can write JavaScript functions in .js files and call these functions in your PHP files. For example, form validation is something that is usually done with JavaScript. If a user tries to search something on your website without entering any keywords in the search box, it is JavaScript that tells the user that she should enter search criteria.
Following these steps, you can easily create a custom WordPress theme of your own. These steps will convert your PSD file in a functional WordPress theme. However, some people look for free PSD to WordPress converters. There are many companies out there who claim to take your PSD file and turn it into an exact theme. If you do not want to get into the hassle of learning programming, you can simply give your PSD to these companies. But of course they charge for this!
I have come across the Elemente software by DivineProjects. You can download this software free of cost and it will convert your PSD into a ready to use fully functional WordPress theme. This software works as a Photoshop plugin.
I hope this article was useful for you. If you have any question on this subject, please feel free to ask. I will try my best to assist you. Thank you for using TechWelkin.
Sir ,
may i get your software download link which will convert PSD to WordPress theme as you told your last peragraph?
Elemente software by DivineProjects doesn’t seem to exist anymore. Do you have a link to the Photoshop download?
your tips of pds to wp conversion is really easy to follow even i wanted to change my psd designs into wp
this will be helpful!